
 1726
1726
This document, and the content contained herein, is intended for customers, users and other persons with the operation and features of the covered Hegla products. While Hegla makes every effort to include accurate and useful information, it is not possible to anticipate or address every possible situation or to account for conditions at unknown locations or interactions with unknown systems or components. Therefor, these documents must be used only for informational purposes and used in conjunction with best practices and with due care. Hegla shall not be responsible for any injuries or losses that occur as a result of the information in this document. Moreover, as products and offerings change over time, the usefulness of the information in this document may become obsolete. It is the responsibility of the reader or consumer to ensure that the information contained herein is timely and reflects the current reality of Hegla products and offerings. Hegla disclaims any and all warranties regarding the information in this document.
***Read chapter 1 of your operators manual before undertaking any work in the area of the overhead crane or floor loader equipment.***
When in doubt please contact Hegla service before taking action (404) 763-9700

Programming an Allen Bradley Panel View
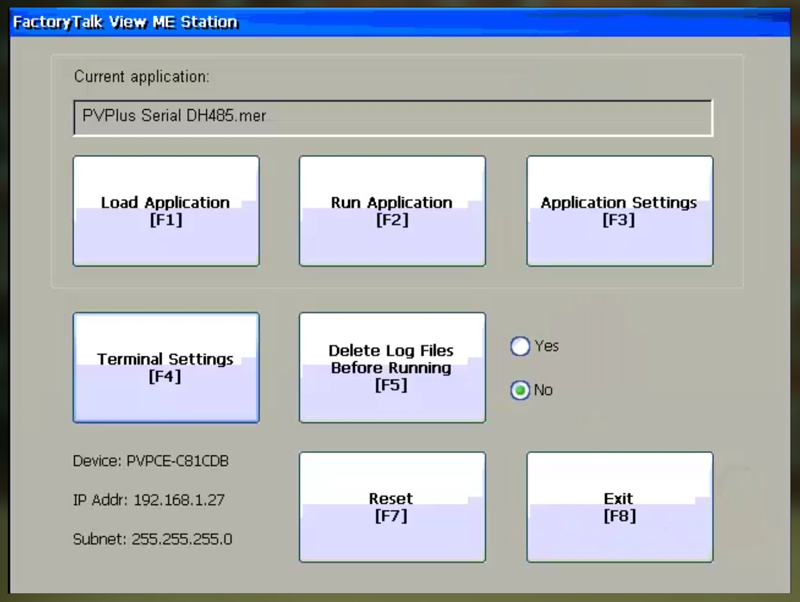
Step 1) Power on your PanelView Plus and return to the main configuration menu as shown below:
NOTE: If an application is running, exit it via the shutdown button. This is typically found on the Information Screen. (Hegla panel programs require you to go into the service login then use the SHUTDOWN button)
Note: If you don’t know how to get back to the main configuration menu, please click the link below:
How do I access the PanelView Plus Configuration Menu?
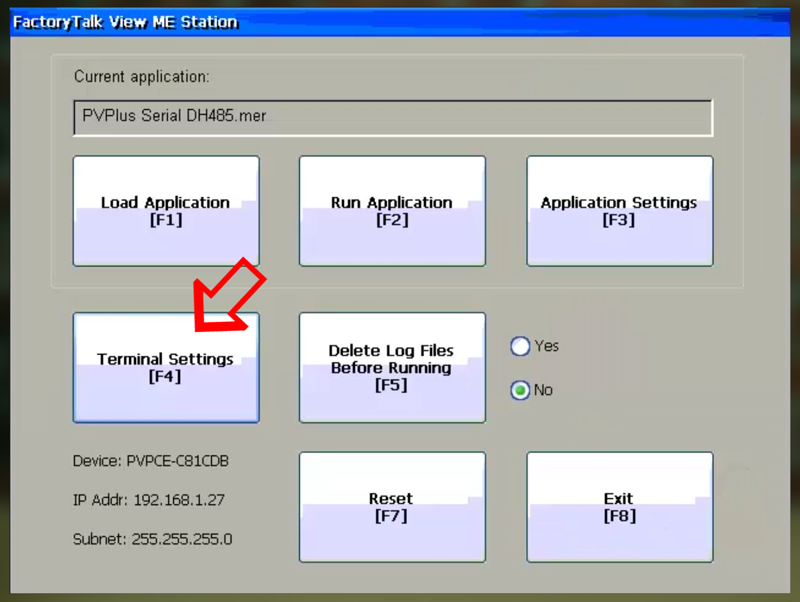
Step 2) Now Select “Terminal Settings”:
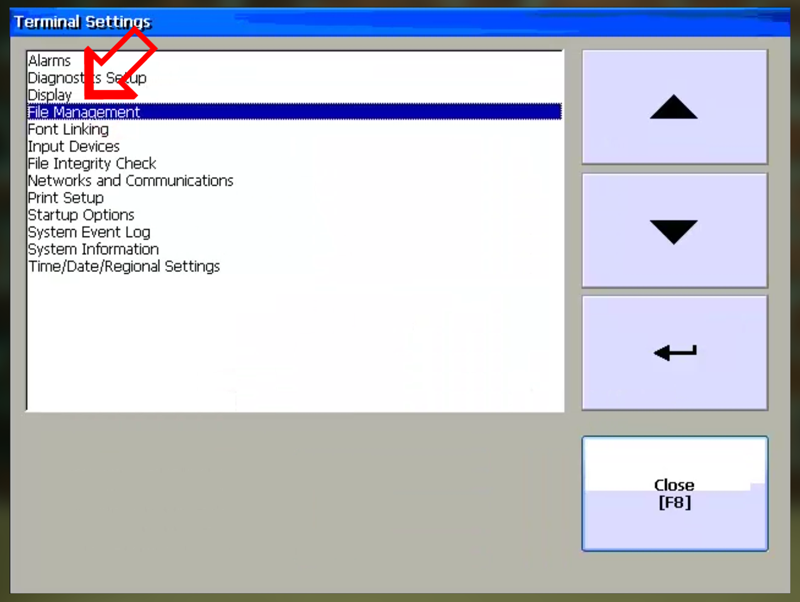
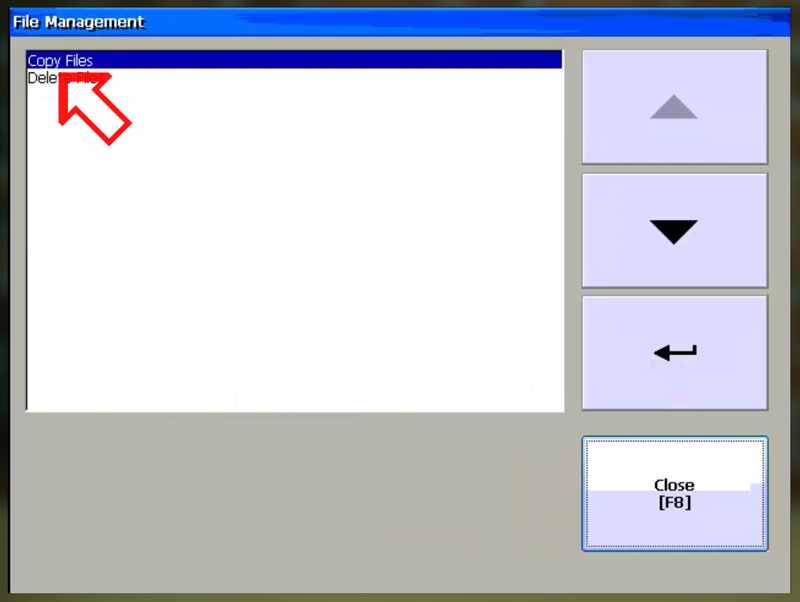
Step 3) Next, scroll down and select “File Management”:
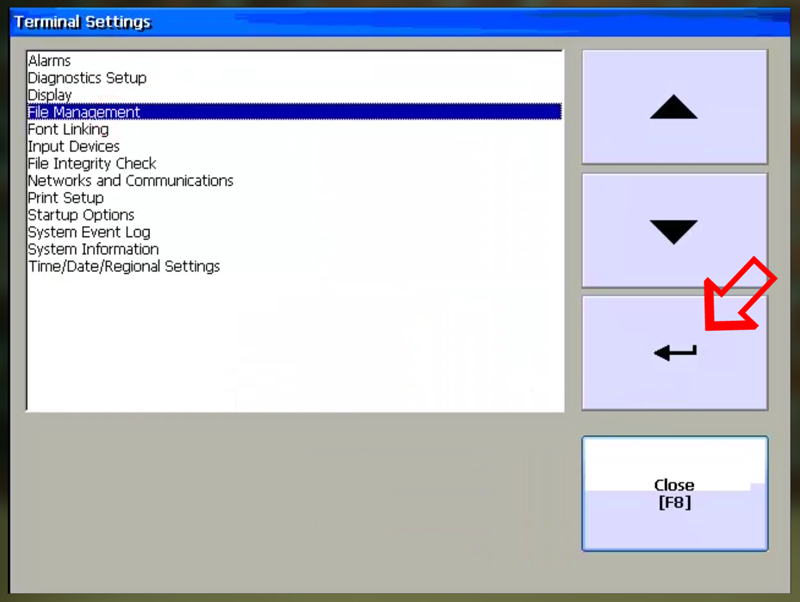
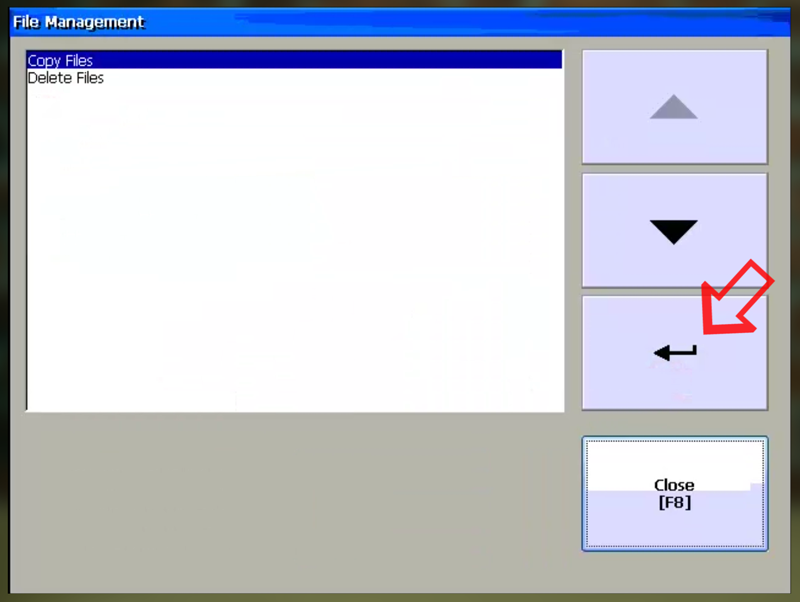
Step 4) Now select the Enter button:
Step 5) Next select “Copy Files”:
Step 6) Select the Enter button again:
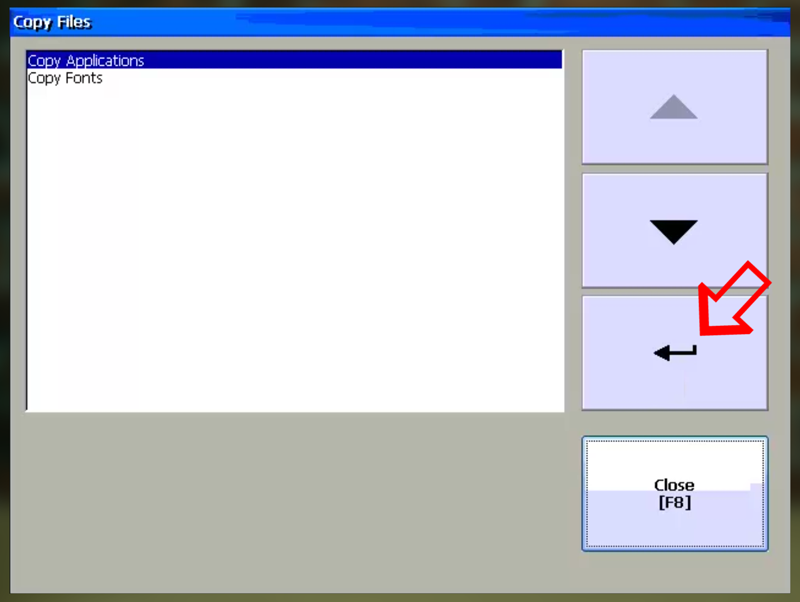
Step 7) Now select “Copy Applications”:

Step 8) And select the Enter button:
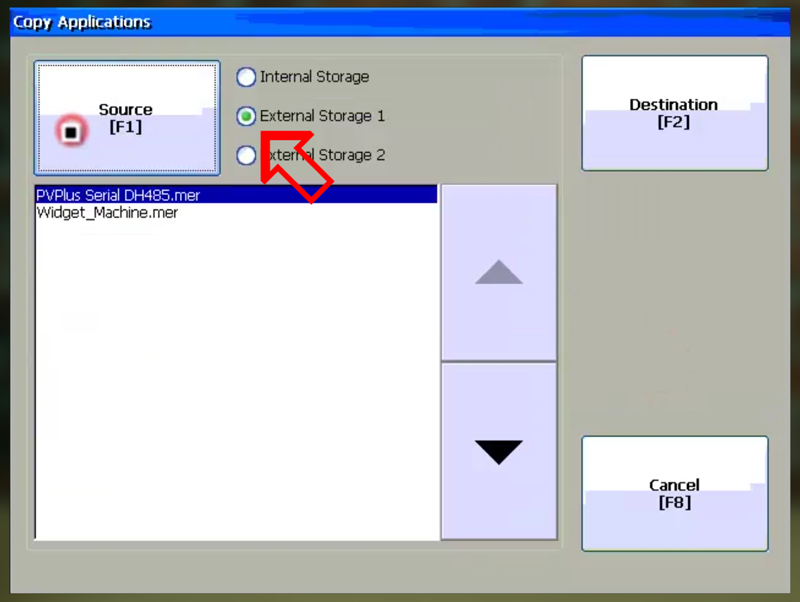
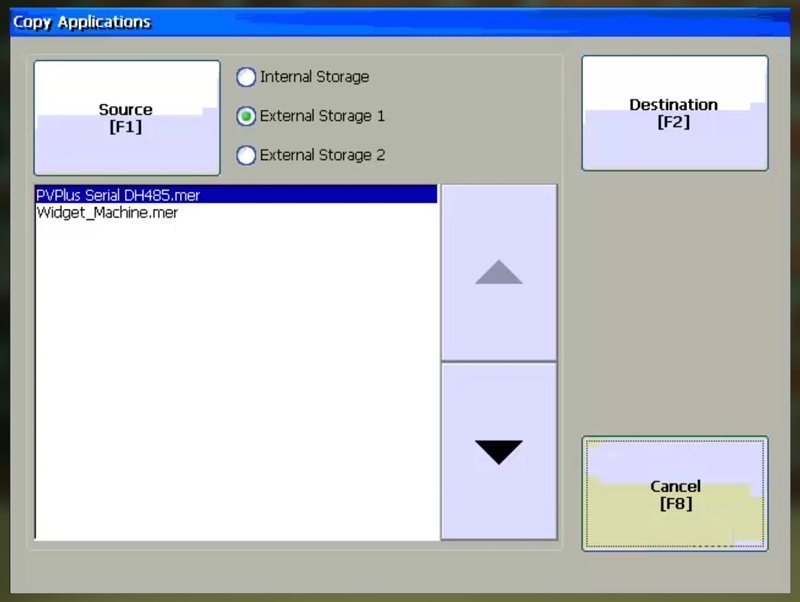
Step 9) Now you’re in the “Copy Applications” screen, and you need to chose where to copy your .MER runtime file from.
“External Storage 1” would be a memory card, while “External Storage 2” would be a USB Flash Drive.
Below you’ll see both those options available as I have installed compatible devices into both ports:

Step 10) Select the location of your memory deivce and you should see a list of .MER runtime files.
NOTE: Your runtime files must be located in the following directory for the PanelView Plus to find them: “Rockwell Software\RsViewME\Runtime“
Step 11) Now select the file you wish to copy to your PanelView Plus:

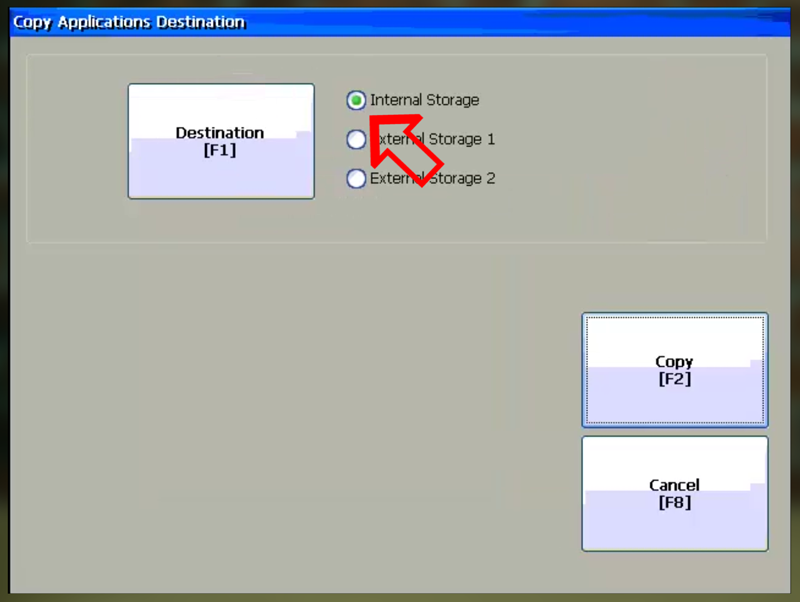
Step 12) And then select “Destination”:

Step 13) Next choose “Internal Storage”:
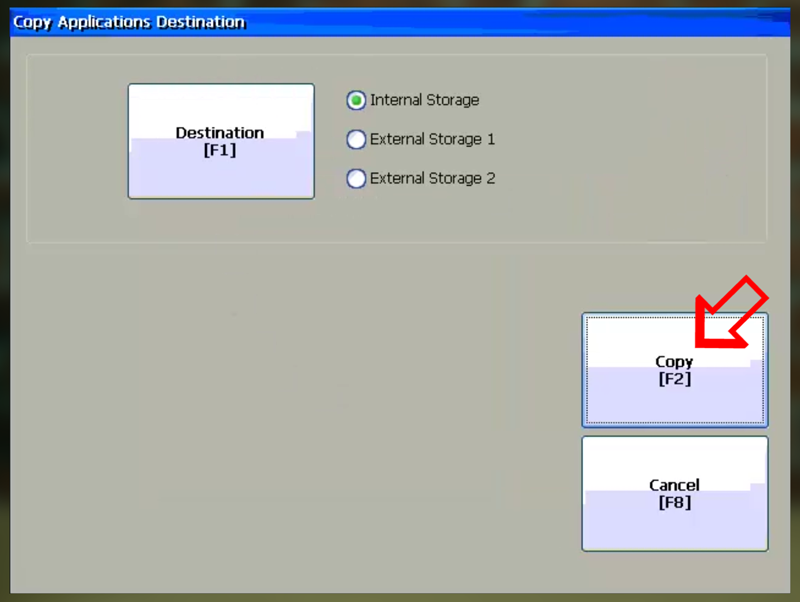
Step 14) Then choose “Copy”:
Note: The copy process can take 2 seconds to 2 minutes, depending on the size of your MER runtime file and the devices being used.
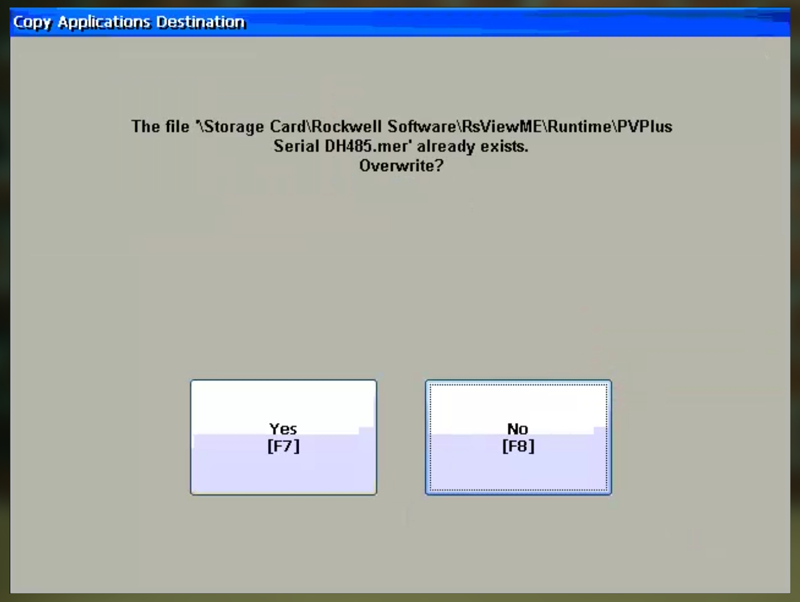
Step 15) If a file with the same name already exists on the PanelView Plus you’ll be prompted to confirm if you would like to overwrite it:
Step 16) Once done, you will be returned to the “Copy Applications” screen and can select “Cancel,” then “Close” three times to return to the main menu:
If the IP settings have not been written into the panelview (I.E. new panelview) then you will need to enter this information (see below)


